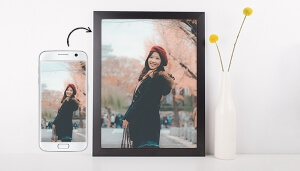
The right imagery and materials can turn your space into a conversation-starting environment in no time! Here are some tips for selecting the right décor solutions for any environment.
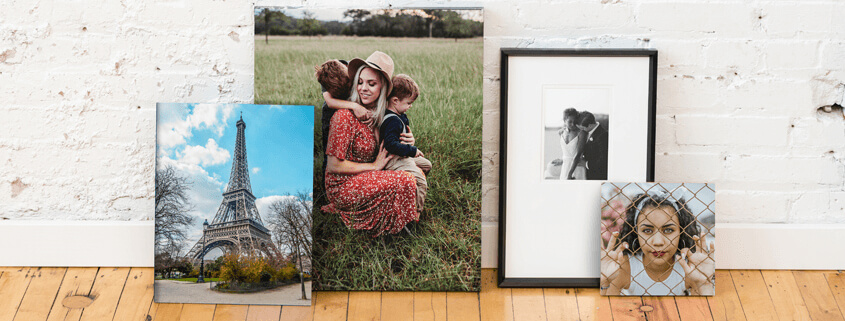
PRO TIP: Mix complementary media like framed prints, canvas, and metal for an eclectic and varied aesthetic!
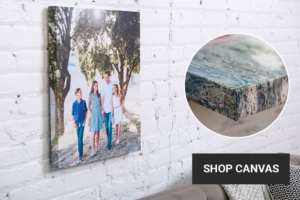
Canvas = Classic
Printed on artist-grade cotton canvas media
Finished for durability and longevity
Lightweight and ready-to-hang (No need for framing.)
Dozens of size options
Ideal for a traditional home or office setting
Metal Prints = Impact
Your image is sublimated onto sturdy brushed aluminum
Images look vibrant, bold, and sharp
Dozens of size options
Ideal for a contemporary home, a commercial location, or modern office setting
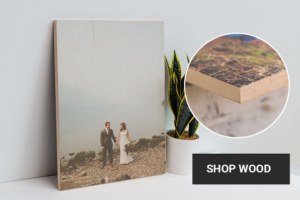
Wood Prints = Natural
Your image is printed directly on a natural wood panel
Photos look sharp, yet soft and natural
Woodgrain shows through the lighter areas of the image
Ideal for a shabby chic or farmhouse styled space
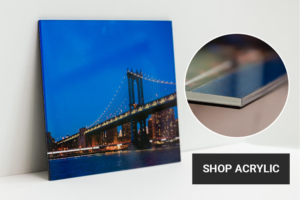
Acrylic Prints = Pizzazz!
Your image is flush-mounted underneath a clear piece of acrylic
Images look bright, dimensional, and sharp
Extremely durable and easy to clean
Ideal in a contemporary home or a commercial space
https://fleetwoodphoto.com/wp-content/uploads/sites/22/2021/09/main.graphic.jpg321845Natalie Gunnhttps://fleetwoodphoto.com/wp-content/uploads/sites/22/2023/09/new_web_logo-1-300x138.pngNatalie Gunn2021-09-05 09:18:512025-06-11 14:54:45Tips for selecting the perfect Wall Art for any space!
Does this sound familiar? “I have photos on a bunch of old CDs, thumb drives, external hard drives, in albums and then there is my Dropbox, Google Photos, and maybe I’ve backed up to iCloud…help, I am overwhelmed!” Before you can start to organize your photos, you have to get them ALL into one place. During week one we will focus on gathering your photos.
Even if you aren’t ready to physically gather them, making a list is a useful first step, and you’ll be more prepared when the time is right to embark on the organizing.
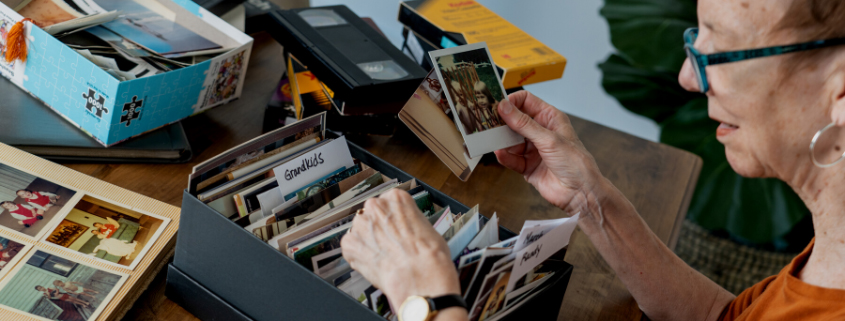
Locate all your photos, slides + videos.
Let’s start with a list of all the places you are storing your printed photos and slides. Include photo albums, framed photos, photos in drawers or boxes or closets, or even storage units. A written list of locations will serve as a checklist when you gather them.
Make a list of all the places you have digital photos. Include old phones, computers, memory cards, and CDs/DVDs. Add usernames and passwords to photo websites where you’ve uploaded pictures.
Home movies should be part of what you’re saving! Make a list of the types you have (Super 8, VHS tapes, camcorder tapes, etc.) so you can make a plan for converting them to digital.
Ask family members!
Get the family involved in tracking down your photos. Ask relatives where their photos are and make a plan to include them in your photo organizing project.
Estimate.
How many photos do you have: 10,000 or 100,000? Knowing the number helps you plan the scope of the project. A shoebox = 600 – 800 photos; 1 GB = about 560 JPGS; the average photo album = 200 photos.
Be selective. Keep only the best of the best!
Are you finding lots of duplicates as you go through your photos? Toss or delete doubles, blurry shots, and most scenery-only photos. Edit your collection down to a manageable size! You may end up getting rid of 50% or more.
Plan for the digitizing process.
You’ve found your photos, but now what? You need a plan. This week, we’ll explore creating a photo legacy by understanding what’s most important to you. What are your photo goals and what would success look like? Then strategize a plan to digitize and back up your photos.
Even if you’re not ready to do the actual organizing, thinking through these decisions about your photo legacy means you’ll be prepared whenever the time is right to start.
Digitize + Back up
The best backup for your printed photos is to scan them by sending them to a trusted local archiving expert. Don’t risk loss, damage or theft of your precious memories by sending them away to a big box online service.
Next Steps
You’ve found your photos, have a plan, and know the stories. Now it’s time to share. The options for printing photos are endless, from framed prints and photo gifts to photo books. Online galleries make it easy to share digitally. Look for ideas to bring your photos back to life by getting them into your everyday life.
Even without starting to organize your whole collection, it’s easy to bring photos back into your life…choose recent favorites from your phone and get creative!
Plan ahead for holiday giving
Get a head start on your gift planning. Digitized family moments is an excellent gift idea for anyone in your family. Surprise family members with a digitized collection of memorabilia!
https://fleetwoodphoto.com/wp-content/uploads/sites/22/2021/09/Organizing-Tips-PR-Blog-Main-Image.jpg321845Natalie Gunnhttps://fleetwoodphoto.com/wp-content/uploads/sites/22/2023/09/new_web_logo-1-300x138.pngNatalie Gunn2021-09-01 09:52:412025-06-11 14:54:31Archiving Best Practices
There were once so many different slide projectors on the market that your local camera store probably stocked more than 100 different types of replacement bulbs to be sure they had the one you needed. The most popular by far, was the Kodak Carousel projector introduced in 1964. It was also one of the longest-running, produced in some variation through 2004.
Slide film was the first to capture rich, saturated colors that sparked a new romance with photography. Slide projectors were the revolution that allowed every hobbyist to relive and share their own photos in an experience otherwise known only to Hollywood.
The hit series Mad Men based a 2007 episode on the magical marketing campaign that bestowed Eastman Kodak’s “Wheel” with the now famous name, “Carousel,” pitched as the magic machine that let you travel through your memories as a child would. “Around and around and back home again, to a place where we know we are loved,” quipped the advertising pioneers.
That dramatization is fictional but it is likely that Kodak used the name CAMEROSITY in some early development. You can use it to decipher the serial number into a date of manufacture, where C=1, A=2, M=3, and so on.
If you still have a carousel projector in working condition, it’s worth hanging onto. Some are being converted with LED bulbs into automated slide scanners. And with slide film still in production and the resurgence of 35mm film cameras, you might even view your next vacation through one!
https://fleetwoodphoto.com/wp-content/uploads/sites/22/2019/08/Main.graphic.jpg321845Natalie Gunnhttps://fleetwoodphoto.com/wp-content/uploads/sites/22/2023/09/new_web_logo-1-300x138.pngNatalie Gunn2019-02-04 12:00:022019-08-12 13:30:35Around And Around And Back Home Again
You probably know the resolution of your phone’s camera. But what does that mean in real life? Can I make this big enough to live on my wall? Or just on my bookshelf?
You’ve probably heard the detailed answer before, or at least the first few sentences before your eyes glazed over. It’s the one where we start dividing the number of pixels by the desired print resolution to… are we losing you already?
Here’s a much simpler rule of thumb: MP = IN, or megapixels = inches. If your iPhone has a 12MP camera, stick to prints no larger than 12”. A square 12×12 or a rectangular 12×16. It’s a rough guide and there are some exceptions, but the math works out to about 300 pixels per inch. Here’s an example (skip this if the details bore you):
The camera(s) on the iPhone 8 and iPhone X capture 3024 x 4032 pixel image. Multiply to get 12,192,768 pixels, or 12.1 megapixels. If we instead divide them each by 300 (the threshold for photo-quality prints), we get 10.08 x 13.44 inches. That’s the largest size you print that will technically be considered photo-quality.
If, like us, you’re a stickler for quality and only the highest resolution will do, we’ve got you covered. We can diagnose any image you throw our way. But this quick tip will get you in the ballpark without any unnecessary math anxiety!
https://fleetwoodphoto.com/wp-content/uploads/sites/22/2018/11/Blog.021.-How.Big_.Can_.I.Print_.1.jpg321845Natalie Gunnhttps://fleetwoodphoto.com/wp-content/uploads/sites/22/2023/09/new_web_logo-1-300x138.pngNatalie Gunn2018-11-02 11:31:442018-11-02 13:35:38How Big Can I Print, Really?
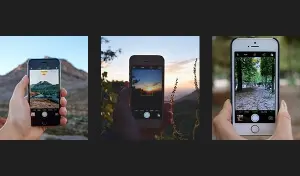
Did you know there are hidden controls in your iPhone camera app? You’ve probably seen the flash and HDR controls and you know that swiping left or right changes the aspect ratio and photo to video mode. Those are labeled on the screen so they’re hard to miss. But what about features that aren’t labeled?
Here are the four best, most overlooked iPhone camera tricks.
1. Swipe left from the lock screen to open camera.
If you’re thinking, “That’s not revolutionary,” then you’re not paying close enough attention. From the LOCK screen. Which means you can raise your phone and be ready to shoot in one swipe. That’s the difference between getting or missing the shot compared to swiping up from the home screen, which requires you to first authenticate with a passcode, Touch ID or Face ID. This also answers that nagging question you’ve had about those three tiny dots at the very bottom of your lock screen and why the one on the right looks like a camera.
2. Selective AF/AE
Selectawha? Touch anywhere on the screen to autofocus (AF) on and auto-expose (AE), for the lighting in that particular part of the frame. Like when your subject faces are too dark because the background is bright. Or when you want to focus on the stage far away, rather than the person’s head directly in front of you. With a single tap, you now
have complete control over your composition.
3. Exposure Compensation
What if the area on which you want to focus on isn’t the area that you want to expose for? It’s too dark or bright. The answer lies in the small yellow sun icon on either side of the AF/AE box. Slide it up or down to compensate for over or underexposure. Only once the power of this tool sinks in can you fully appreciate the gesture of moving the sun with
your finger.
4. AF/AE Lock
You are now a master. Selecting your focus point, adjusting exposure, and then… You recompose and the frame resets. What? Is all this newfound power really so fleeting? Of course not. Enter AF/AE Lock. The term borrowed from pro dSLRs is just as impressive as it sounds but as simple as you’d expect on your iPhone. Instead of tapping the screen
to select your AF/AE point, touch and hold for two seconds. The selection frame pulsates to confirm and the phrase AF/AE Lock appears on screen. Move your frame anywhere you’d like and your settings remain. Now, you’re a master.
Well, what are you waiting for? Go put your new brilliance to work!
https://fleetwoodphoto.com/wp-content/uploads/sites/22/2018/09/Blog-020-Best-Iphone-Camera-Tricks.jpg3601125Natalie Gunnhttps://fleetwoodphoto.com/wp-content/uploads/sites/22/2023/09/new_web_logo-1-300x138.pngNatalie Gunn2018-10-08 16:29:352018-09-27 18:32:13The Best iPhone Camera Tricks You’re Not Using
How to discover the shutterbug inside a six-year-old. Like most grade school aged children, mine own tablets and can swipe my phone faster than a New York City pickpocket. But they rarely use the devices’ cameras. The most recent photo in either child’s camera roll? A series of 38 selfies with a blurry dog-looking thing from over four months ago. Other parents I’ve surveyed tell me this evidence is typical. We assume they haven’t yet developed an interest in photography. When they do, the device with a camera is ready and waiting.
But if you’ve ever handed an actual camera to a kindergartner, for example, you know there’s more to it. And the older the camera, the better. One with a viewfinder and no screen really gets the gears turning. After they realize what it is (and that there are no games on it), the purpose sinks in. They discover a different tool that invokes a whole different curiosity.
Here’s how I spawned the shutterbug inside a six-year-old boy. I’d keep an old digital camera handy and anytime we left the house, I’d set it in the back seat. He couldn’t not pick it up and within a couple weeks he was taking it out of the house of his own accord. Sure, that was usually when his other device was off limits, but I say any interest counts. Sometimes, he’d take 38 pics of the seatback out of boredom. But often he’d take real pictures. And he got better fast. I’d watch as he would stop, compose, capture, and retake until he found an angle he liked. The results were far more thoughtful than anything he’d shot with an iPad. I didn’t try to explain the menu or functions unless he asked so he discovered most on his own and now frequently uses exposure compensation to improve a shot.
Since then, I’ve let him wrangle my DSLR, complete with a gigantic vertical grip attached. It’s obviously cumbersome but he knows what he’s doing and, more importantly, why he’s doing it. The pictures he takes are important to him and although most are viewed on his device and shared between family, a select few have found fame on his older brother’s blog. I think we’ll venture into printing soon.
I’m not surprised that he’s become a pretty good photographer. I’m surprised that maybe he already was. Sometimes all it takes is the right tool.
Fb/Insta
How to discover the shutterbug inside a six-year-old.
#kidsneedcameras #youngphotog #camerakiddo
https://fleetwoodphoto.com/wp-content/uploads/sites/22/2018/04/kidscameras.jpg4321000Natalie Gunnhttps://fleetwoodphoto.com/wp-content/uploads/sites/22/2023/09/new_web_logo-1-300x138.pngNatalie Gunn2018-05-09 08:36:162018-04-17 11:00:16How to discover the shutterbug inside a six-year-old.
We all have them – those meaningful family traditions that we replicate each Christmas season. Maybe it’s watching the big game together, baking from family recipes, decorating the tree or driving through the neighborhood to look at Christmas lights.
When my children were younger, I used to dress them in matching holiday themed pajamas and pose them for a picture under the tree. But as they grew older, I started thinking about finding something more meaningful and lasting to do for them. Something that makes the holiday season special after they leave the house and begin starting their own traditions.
Since I work in the photo industry, I had access to all sorts of options for creative ideas, but one stood out as something that had the lasting power and sentimental value I was looking for – so I landed on personalized holiday ornaments.
These custom ornaments feature an image of our family or the kids, the year and their ages – making reminiscing fun as we decorate the tree. I order multiple copies of our annual family ornament each year – one for each child to keep and one day take with them – plus one that will stay on the family tree at our house.
Now, that my kids are a little older, they love to look for their special photo ornaments while we’re decorating the tree and I love knowing that this tradition will live on for years to come.
https://fleetwoodphoto.com/wp-content/uploads/sites/22/2017/11/holtradblog.jpg265600Erin Von Holdthttps://fleetwoodphoto.com/wp-content/uploads/sites/22/2023/09/new_web_logo-1-300x138.pngErin Von Holdt2017-11-27 08:05:432018-03-06 16:51:45Love holiday traditions? Here’s a great one!